 | |
| Preserving our Natural Resources since 1997 | Your browser can't find the .css style script |
| Home | Equipment | Projects | Contacts | Links | About Us | |
 |
This is what is SHOULD look like.
This is a stock picture of the machine (with turf tires) |
|
August 5th 2005:
This is the way I found it, a 1992 Ford/New Holland model "1920" compact tractor with less than 1,200 hours on it! 38 Horsepower diesel, and it's 4 wheel drive. It has the shuttle shift transmission too! Other than some engine work, it looks like a good machine. |
 |
 |
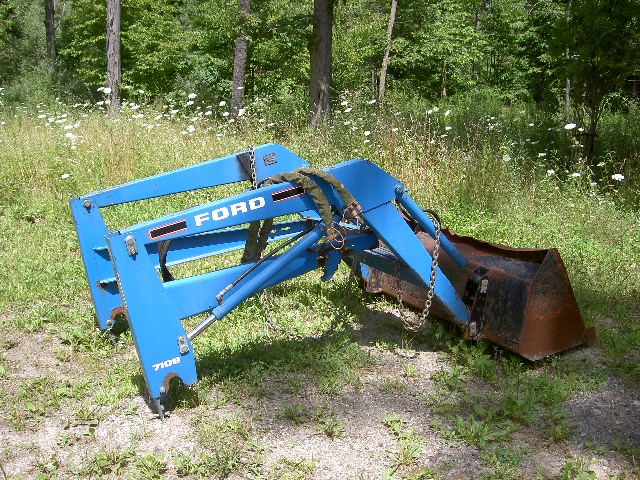
It even comes with a Ford 7108 front end loader! |
|
Ooops, here is why it was such a good deal
Maybe that a little more than "some" engine work! Always check your oil! |
 |
 |
This is what's left of the piston and connecting rod, what a mess!
The story I'm told is the oil pan was punctured some time back, and JB weld was used to fix it (for a while). One winter day while it was idling to warm up, the engine stalled and wouldn't restart, now it's mine! |
| Here she is parked in my garage ready for some action. |  |
 |
Ouch, only a few bolts, and the front end wheels right off.
I'm looking for a used engine, or used parts to build up a new engine. |
|
The engine assembly came right out. The dual clutch on the back is huge!
I need to get my engine stand I used on the dozer before I can go much further. I might go and get the stand this weekend. Gas prices shot up this week, it seems it would be cheaper to buy one, than drive north. I called around, and ended up borrowing a stand from Mark |
 |
 |
Sept 18th: I found another block, but it was about junk, so they knocked off a few bucks.
The block had broken studs, the lifter bored are all rusted and nicked up.
Also the cylinders had big rust rings, so it needed to be bored out 0.040" oversized.
This is the block after I had the cylinders bored. I spent the weekend cleaning up the lifter bores, and removing the studs, and finding other broken stuff in the block. Tragically, I found the crank bearing seat are cracked too! This tractor is turning into a disaster! |
|
Lady luck smiles again! asking around at work, I found the name of a master welder that said he can weld up the cracks for me.
To keep the cost down, I did all the prep work myself. It's ready to go "under the knife" this week! |
 |
 |
Chris Razor of Hi-tech Welding did a dandy job fixing my cracks! |
|
With all of the parts prepped and ready to go, all I had to do was assemble everything!
Here the crankshaft goes in. |
 |
 |
Ready to pop in the pistons, cam and oil pump, we're getting there! |
| Wow, it looks great, I think we're ready to put it in! |  |
 |
We had to setup an overhead beam to allow the engine to slide onto the transmission shaft. |
|
Easy as pie, we had it on in no time! Now to finish the assembly of the tractor.
I think Carol really wants this out of the garage soon. By the end of Saturday night, we had everything assembled, timed and adjusted. We're ready to fuel it and fire this pig up! |
 |
 |
No, this picture is not out of order.
Before I started the engine, I pressurized the cooling system, it didn't hold. Notice the drips of coolant on the crank? It's in the oil pan too, this is not good at all! (insert bad words here) |
|
After removing the engine from the tractor it seems the block is cracked in several spots in the water jacket.
That's it for this block, I'm getting my money back. I guess I'll have to start over! |
 |
 |
October 24th: I hunted down another used block, this one was in fabulous shape!
After I had it bored 40 over, I stripped it bare, power washed, and started the assembly all over again. I had to press out the cam bearings, the oil pump housing and the front crank bearing, and press them into the new block. Here the cam and crankshaft are set in. |
|
I had to re-wash all of the parts that went into it.
The pistons are ready to go in next! |
 |
 |
She's almost ready to go in. I installed new plugs for the water and oil passages.
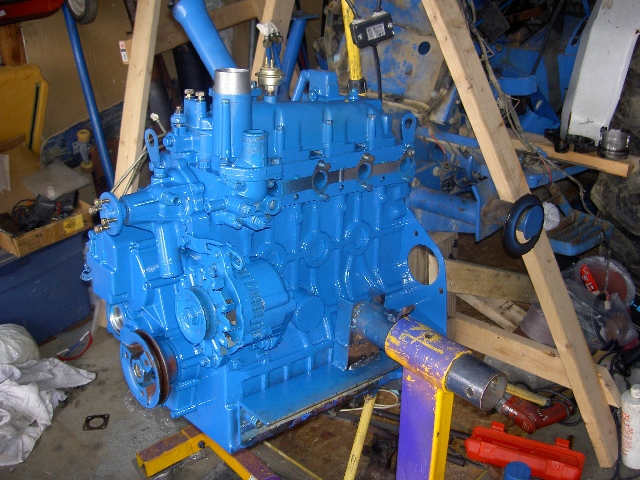
Here the head is on, valve train installed, and the timing cover all buttoned up. This time I hung the radiator on the dressed engine. It held coolant pressure overnight, I think we have a winner! |
| I squirted some paint on it to make it look pretty, and bolted it to the transmission. |  |
 |
After a few days of assembly, she's ready to roll!
I pressure fed oil to the engine before I started it. I fueled the injector system, bled the air from the lines, and it fired right up! |
|
Yahoo! My first tractor!
Now I have to go back and get my front loader. |
 |
 |
October 8th 2005: I went back and picked up my front loader.
It's heavier than I remember, I wonder how I'll get it mounted? |
|
I slid it to the back of the trailer, I jacked it up, then built a wooden stand for it.
I moved the trailer, and drove the tractor right under it. Bolting it on was a breeze! |
 |
 |
My new toy, ready for the trip north! |
|
October 2006: I noticed a bit of hydraulic oil sprayed out when I used the 3 point to lift the brush hog.
I had to remove the rear wheel and tire. It looks like a broken weld on a hard hydraulic line, right above the axle flange. (green circle) |
 |
 |
Yep, that's it. It looks like the tube fractured right at the weld joint. That's piece is gonna have to come home with me. |
| June 2007: We bought a tiller to prep some gardens and feedplots. After making a little plot at Bloom, we headed to the Rosted Estates for a garden |  |
 |
We just finished up the garden when the hydraulic tube let go again! This time we bought a new tube, I hope that fixes it! |
|
March 2009: After we got her back on her feet from the overhaul, we found the front end was really worn out and the steering cylinder was bent.
We finally found some time this year to take it home for some work. Spring is always a good time to work on tractors, but the snow really slowed us down. (Thanks Mark!) |
 |
 |
The front end comes off fairly easily. we ordered all new bushings and seals. We straightened the cylinder rod too. |
| back to the top | |